
My husband and I carpool to work. We haven’t always, but over past year we have been lucky enough to both work in the same general area, which happens to be about ten minutes from home! I love carpooling – we save a bit of money on gas and my husband makes me laugh before 7 AM just about every day. Because we are so close to home, we usually head there for our lunch break (bonus: that means I don’t have to spend time thinking about what to bring for lunch).
About two weeks ago we were on our way home for lunch and a commercial came on for a one day sale at The Bay. Le Crueset French Ovens on sale for $159, regular $400!!! I have been dreaming about a french oven for quite some time and that was a smokin’ deal (in my personal opinion). Long story short I immediately got Alex to turn the car around and head straight to The Bay.
Homemade yogurt was one of the main reasons I was wanting to purchase a french oven. I had no idea how easy it was to make yogurt at home until about a month ago when I came across an article from The Kitchn. For those of you who know me well, you know that I can be very frugal when it comes to grocery shopping. Yogurt was one of the products that I feel is totally overpriced. $7 for a tub of greek yogurt seems a little high – am I right?! Needless to say, I will NOT be purchasing yogurt again anytime soon cause I am totally pumped about what I can make with a 2 L of milk and a little bit of patience, right in my own kitchen.
Here is what you need:
- French oven or heavy sauce pan with lid
- Instant read thermometer
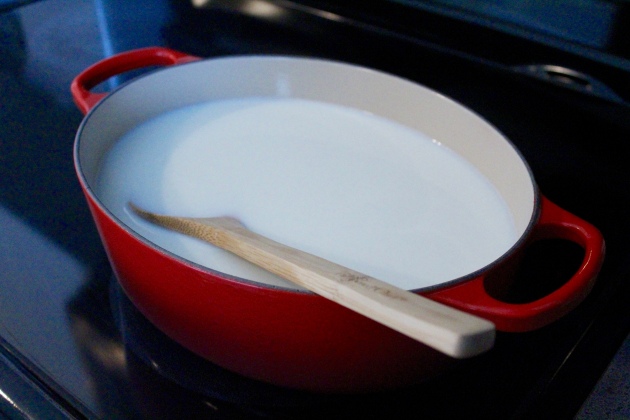
- 2 L of milk (I used 1% cow’s milk)
- 1/2 cup of plain commercial yogurt with bacterial cultures (I used a plain non-fat PC brand greek yogurt)


Instructions:
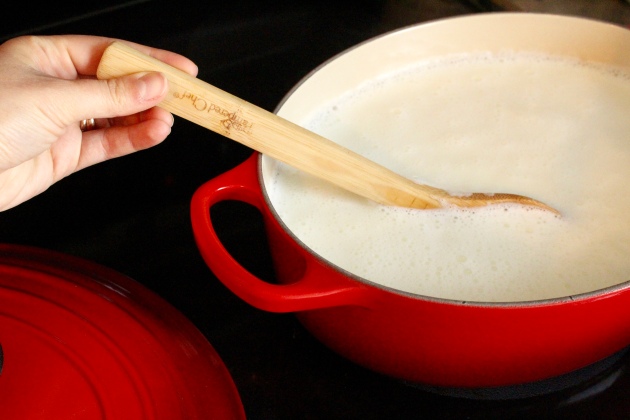
- Heat the milk over medium heat. Stir gently throughout to avoid the milk from scorching.
- Once the milk reaches 200 degrees F – remove from heat. Allow the milk to cool to 115 degrees F. Stir occasionally to help reduce the temperature more quickly or put the french oven in an ice bath.
- Remove 1 cup of warm milk and combine with 1/2 cup of commercial yogurt in a separate bowl. Whisk until smooth.
- Pour the thinned yogurt back into the warm milk and whisk gently.
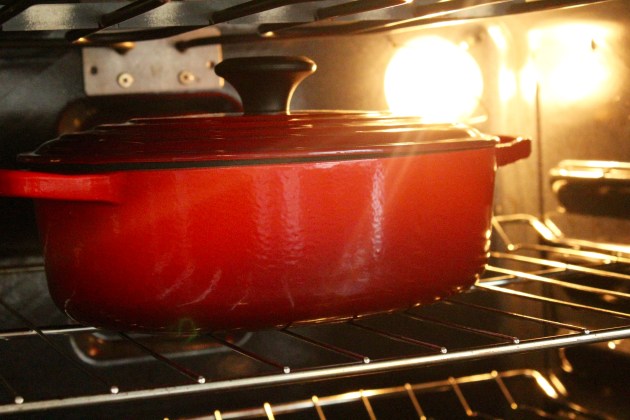
- Cover with a lid and transfer into a room temperature oven (I tried this after cooking something in the oven and it was too hot and did not work!). Turn on the oven light to keep the milk warm while it sets.
- Let yogurt sit overnight. Avoid stirring the yogurt until it has fully set.
- Once the yogurt is set – remove it from the oven and drain off any whey from the surface of the yogurt.
- Whisk the yogurt prior to transferring into jars for a smooth and cohesive texture. Cover and refrigerate.
- Make sure to save 1/2 cup of your homemade yogurt to use in your next batch! The yogurt will stay good in the fridge for about two weeks.
This is a traditional yogurt – not a greek yogurt! If you want a thicker texture you can drain out some of the whey using a strainer and a cheese cloth, use a higher fat milk, or add 1 cup of skim milk powder to the fluid milk during the cooking process.

PS. I added 1/4 tsp of coconut extract and 1 tsp of granulated stevia to 3/4 cup of homemade yogurt and topped it with toasted coconut and sliced strawberries and it was pretty unbelievable. I’m on the coconut bandwagon and I am NOT getting off. But really, the sky is the limit when it comes to mix ins!
